| Chapter 4. Installation Walk-through | ||
|---|---|---|
 |  | |
Chapter 4. Installation Walk-through
Table of Contents
- 4.1. Introduction
- 4.2. License Agreement
- 4.3. Select Components
- 4.4. eCosPro component base directory
- 4.5. Installation Location
- 4.6. Connection Information
- 4.7. Enable eCosPro applications
- 4.8. Summary
- 4.9. Installing
- 4.10. Installation complete
- 4.11. Installing the Host Tools and GNU source code
- 4.12. Eclipse Installation
- 4.13. Linux Console Installation
- 4.14. Individual Installation and Build Environment
The eCosPro Developer's Kit installation process is essentially the same for both Linux and Windows. The screens displayed in this chapter, Chapter 4, Installation Walk-through, are primarily those encountered during a typical installation on Windows 10. The screens on other versions of Windows, as well as Linux distributions, will be very similar.
4.1. Introduction
This section assumes you have started the installer as described in either Section 3.1, “Installation on Linux” or Section 3.2, “Installation on Windows”. While root access on Linux is no longer a requirement, you must be logged on as Administrator or a user with Administrator privileges on Windows.
If the eCosPro Developer's Kit is already installed on the host, you will receive a warning pop-up and be asked if you wish to re-install, overwriting any previous installation. For further details of reinstalling components, please read Chapter 9, Reinstalling Components.
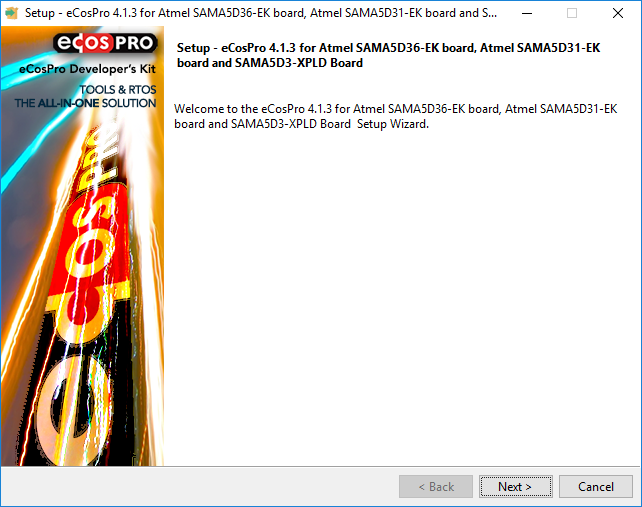
Figure 4.1, “eCosPro Installer Introduction Screen” illustrates the first window, the introduction window, of the eCosPro GUI install process.
Figure 4.1. eCosPro Installer Introduction Screen
4.2. License Agreement
The software provided in the
eCosPro Developer's Kit falls under
a number of different licenses. The dialog box illustrated in
Figure 4.2, “License Agreement Screen” allows you to read these licenses,
also available online at
http://www.ecoscentric.com/licensing/ecospro-distribution-licenses.shtml.
The installer will not allow you to continue with the
installation until you agree to adhere and abide by all of the terms and
conditions of all of the licenses. If you agree, select the option
marked “I accept the agreement” and
press “Next”. You will
then proceed to the screen described in
Section 4.3, “Select Components”.
Figure 4.2. License Agreement Screen
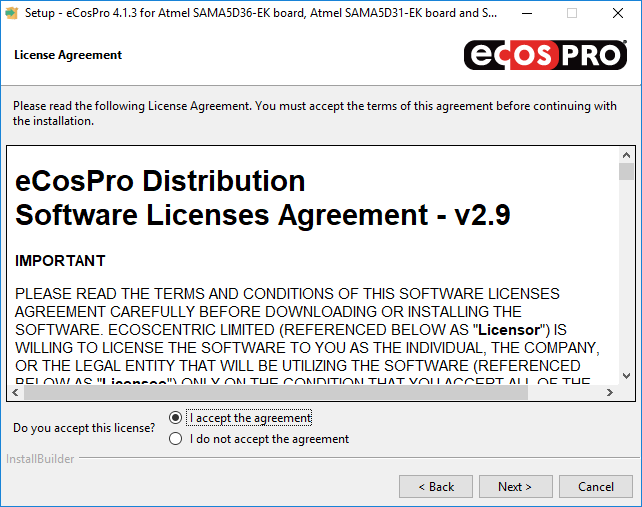
If you do not agree, select the option marked
“I do not accept the agreement” and select
“Next”. A pop-up will confirm you wish
to exit the installation.
![[Note]](pix/note.png) | Note |
|---|---|
By selecting |
4.3. Select Components
The eCosPro Developer's Kit is made up primarily of four different components, each with its own installer:
eCosPro Release
This is also known as the primary installer as it allows the automated installation of the remaining components When optional components are selected in this installer, the corresponding installers are also executed.
The default installion consists of all eCos and eCosPro sources and documentation, and components 2, 3 and 4 below.
eCosPro Host Tools
The default installation consists of all host binaries and documentation.
The eCosPro Developer's Kit for Windows is accompanied by an eCosCentric distribution of MSYS2.
eCosPro GNU Toolchain
The default installation consists of all host binaries and documentation.
eCosPro Eclipse CDT Plugin
The default installation consists of Eclipse CDT, the eCosPro CDT Plugin, and documentation.
Figure 4.3. Select Components
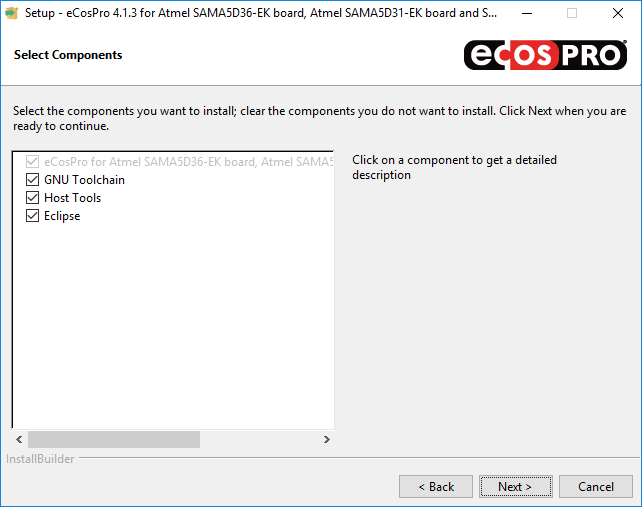
The component selection frame allows you to determine which components or items, along with their default sub-component selections, are to be installed. Naturally, the default sub-components differ between installers. For example:
- The Host and GNU Tools installers have the source code as an optional item, not selected by default, with the binaries as a compulsory item.
- The Windows Host Tools installer will install eCosCentric's MSYS2 distribution by default, if not already installed.
- The Eclipse installer has the eCosPro Eclipse/CDT plugin as the compulsory item, with Eclipse as the optional item but selected by default to allow you to install the eCosPro Eclipse/CDT plugin into a third-party version of Eclipse.
- Finally, the eCosPro release installer (also known as the primary installer) has the eCosPro release as the compulsory item, and lists all the former components as optional items, selected by default for installation. If a component is already installed, or is unavailable, it will be delselected and made inactive.
Normally you would leave all components selected as illustrated in
Figure 4.3, “Select Components” and select “Next”.
![[Warning]](pix/warning.png) | Warning |
|---|---|
If you de-select a component, not all parts of the eCosPro developer's kit may function correctly. In this case you are advised to create your own development profile or environment, selecting your own eCosPro host tools, GNU Tools or Eclipse as you require. Please read the section on Profiles in the eCosPro User's Guide for further information on eCospro Profiles. |
4.4. eCosPro component base directory
By default, each component is installed into a separate subdirectory within a main
eCosPro installation directory, also known as the base directory.
This location may be changed in the frame illustrated in
Figure 4.4, “eCosPro component base directory screen”.
The default location of this main installation sub-directory is as follows:
-
Windows -
The directory
eCosProlocated in the root directory of the system drive. For example:C:\eCosPro -
Linux (root user) -
The directory
/opt/ecospro. -
Linux (Regular user) -
The directory
$HOME/ecospro. For example/home/alexs/ecospro.
For example, eCosPro 4.1.3 will be installed into
C:\eCosPro\ecos-4.1.3 on Windows
and $HOME/ecospro/ecos-4.1.3 as a regular Linux user.
Figure 4.4. eCosPro component base directory screen
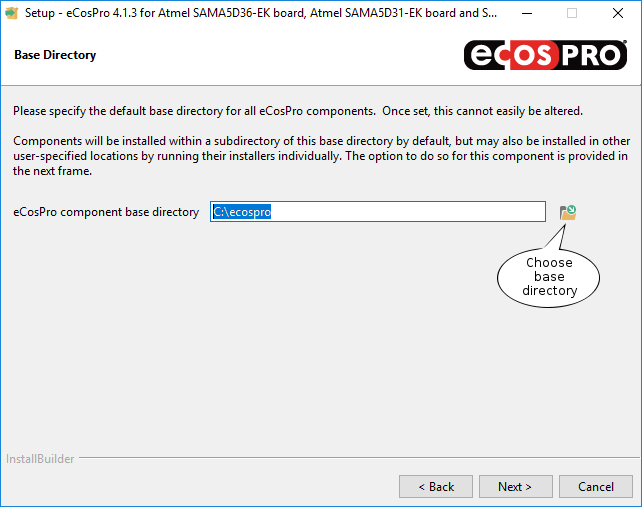
This frame, illustrated in Figure 4.4, “eCosPro component base directory screen”, allows you to select the base directory into which eCosPro components are to be installed by default. Once set, this is used as the parent directory for all subsequent automated eCosPro installations by the primary installer. You will not be shown this frame again.
If you wish to choose a different location for the base directory, select the folder icon called out in Figure 4.4, “eCosPro component base directory screen” to create or browse to the base directory, or simply enter the path to the base directory in the field provided.
Once you have selected or confirmed the base directory,
press “Next”
to select the installation directory for the curent component.
| Warning |
|---|---|
Do not select an alternative location that contains spaces within any part of the path or the folder name. Spaces cause issues with the GNU Tools, in particular GNU make which uses spaces as separators and is used to build eCosPro and its applications. |
4.5. Installation Location
The next step of the installation process is to select where you wish to install the eCosPro component, as illustrated in Figure 4.5, “Installation Location Screen”.
Figure 4.5. Installation Location Screen
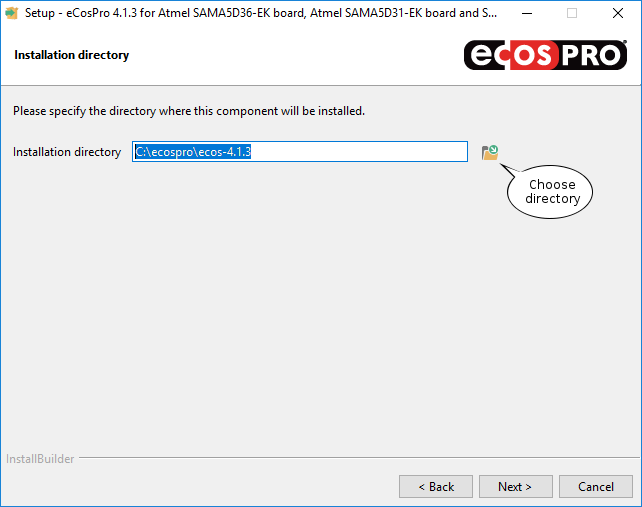
If you wish to install to a different location, select the folder icon called out in Figure 4.5, “Installation Location Screen” to create or browse to folder into which the component is to be installed, or simply enter the path to the installation directory in the field provided.
Once you have selected or confirmed the installation folder,
press “Next”.
| Warning |
|---|---|
Do not select an alternative location that contains spaces within any part of the path or the folder name. Spaces cause issues with the GNU Tools, in particular GNU make which uses spaces as separators and is used to build eCosPro and its applications. |
4.6. Connection Information
To continue the installation you must have internet access available as well as the username and password used to access the eCosPro developer's kit portal at https://www.ecoscentric.com/cgi/nph-epdk.cgi.
Some corporations only permit access to the internet through proxy
servers, some of which also require authentication. If you do not require
the use of a proxy server, ensure the box illustrated in
Figure 4.6, “Connection Information Screen” is not selected and press
“Next”.
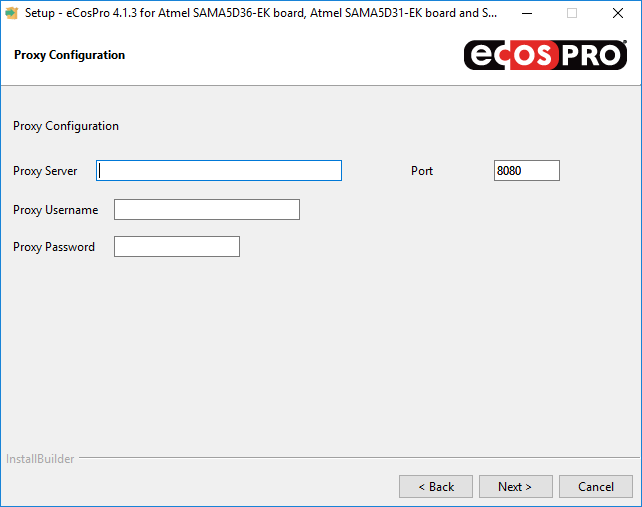
If you require the use of a proxy server, check the box illustrated in
Figure 4.6, “Connection Information Screen”, press
“Next”, enter
the proxy information as illustrated in
Figure 4.7, “Proxy Configuration Screen”, and press
“Next”.
Figure 4.6. Connection Information Screen
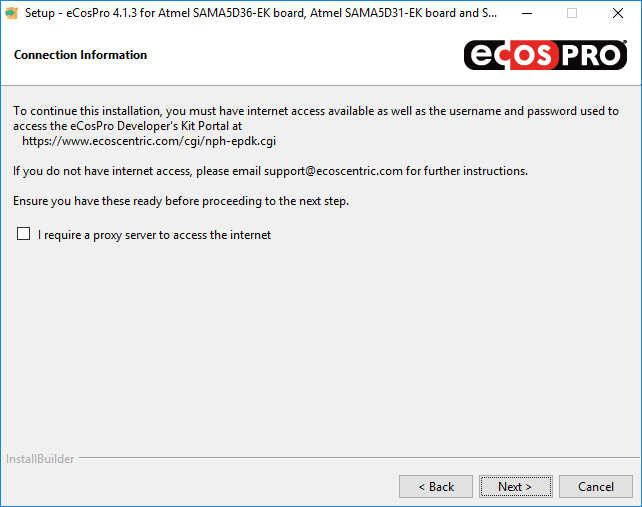
Figure 4.7. Proxy Configuration Screen
4.7. Enable eCosPro applications
Provide the username and password used to access the eCosPro developer's kit portal, illustrated in Figure 4.8, “Connection Information Screen”.
Figure 4.8. Connection Information Screen
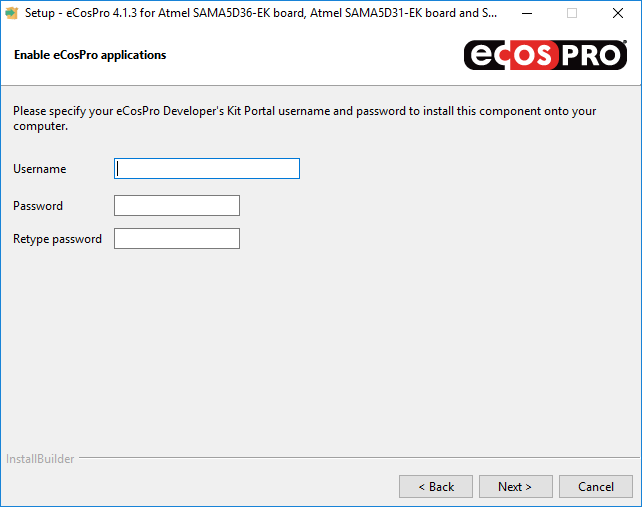
When complete, press “Next”
for the installer to fetch the licenses applicable to you and to proceed
to the next frame.
If you are not licensed for an eCosPro component selected for installation,
the installer will display an error message and exit.
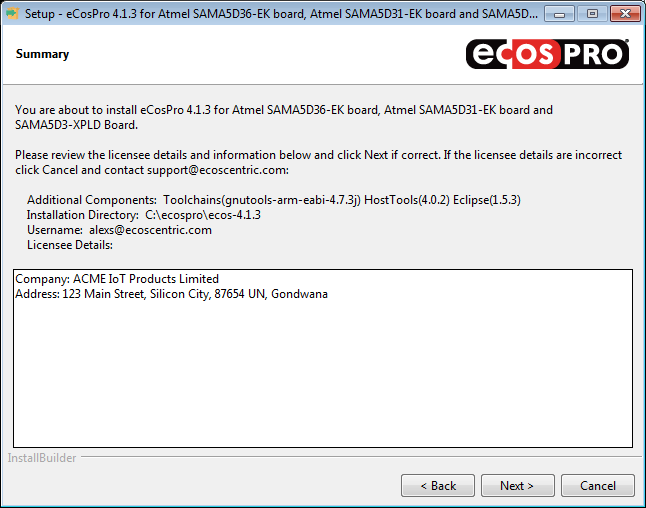
4.8. Summary
The summary page displays the components you have selected for installation,
the installation location, as well as the licensee information. This includes
the name and address of your company and any other details relevant to your
license. Please review the information provided and click
“Next” to proceed with the
installation.
Figure 4.9. Summary Screen
If you do not satisfy the constraints, click on the
Cancel button followed by the
YES button of the following
pop-up window in order to cancel the installation,
and contact eCosCentric.
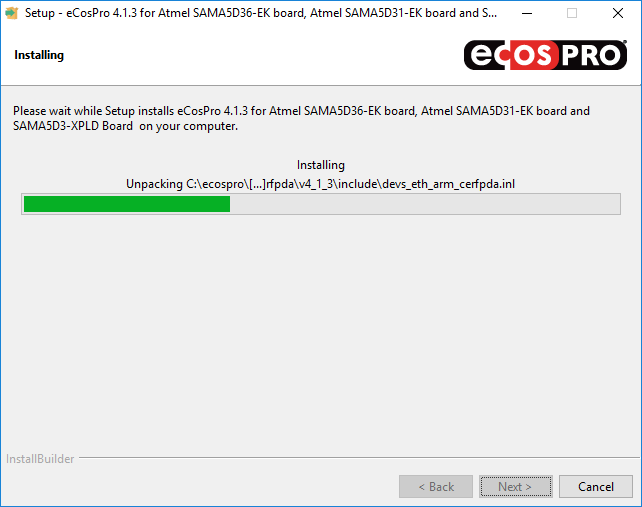
4.9. Installing
The eCosPro installer will commence with the installation of the components selected as illustrated in Figure 4.10, “Component Installation Screen”.
Figure 4.10. Component Installation Screen
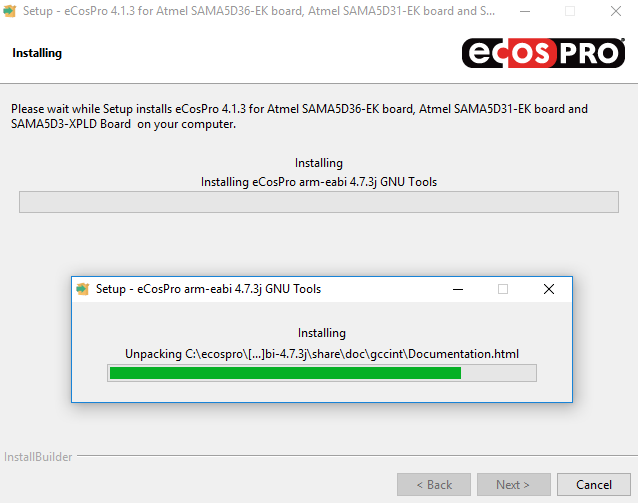
The primary and Eclipse installers invoke various processes and other installers. As a result, various pop-up windows executing commands and providing the status and progress of the installation will also appear as illustrated in Figure 4.11, “Multiple Installation Screens”
| Warning |
|---|---|
Do not close or interact with these pop-up windows. They will close when the command completes or the external component installer finishes. |
Figure 4.11. Multiple Installation Screens
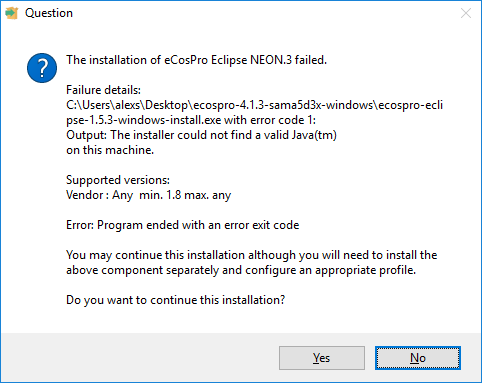
If an error occurs, such as the error illustrated in Figure 4.12, “Missing Java Error Dialog”, you will be prompted whether you wish to continue the installation, ignoring the error or failure, or whether you wish to cancel the installation. If you cancel the installation, components successfully installed by the primary installer will not be uninstalled. Only partial installations will be removed.
Figure 4.12. Missing Java Error Dialog
While every attempt to avoid the use of shared libraries on Linux has
been made through the static linking of libraries, the advance of Linux
distributions has resulted in the change of format and location of
shared files (for example, wxGTK 2.8.18, used by the eCos GUI
Configuration tool, is the most commonly affected through its use of
common icons). In the wxGTK example, the native shared library
libpng12.so is used to prevent such problems arising.
The Host Tools installer therefore runs basic checks to determine
missing shared libraries and provide a warning dialog if any are
detected. If run individually, the Host Tools installer will provide the
user the opportunity to install the dependancy and re-test. Otherwise it
will continue installation and warn the user towards the end of the
installation of the missing shared library. Missing shared libraries
must be installed for the tools to run: please use your native package
manager to determine which package provides these shared libraries
and install them.
4.10. Installation complete
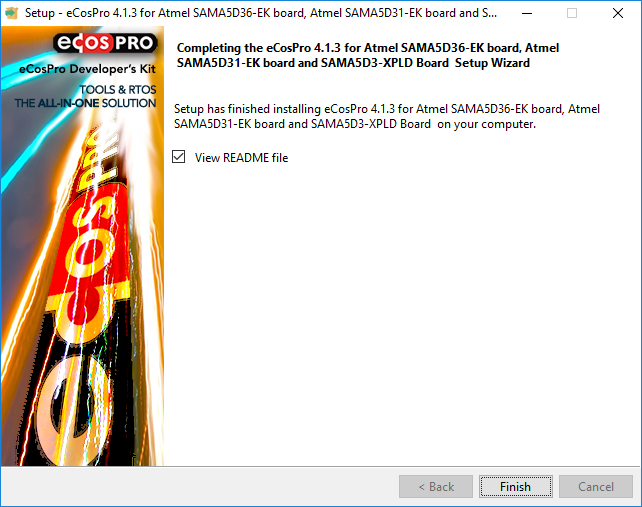
When the installation has completed, a frame such as the one illustrated
in Figure 4.13, “Setup Complete Screen” is shown. At this point,
if there are any documented notes or issues specific to this release,
they will be contained in a README file which
you can optionally display by selecting the checkbox, before selecting
“Finish”. This file is also located at
the root installation directory.
The installer will terminate when the README window
is closed. If the README is not selected, it will
terminate immediately.
![[Important]](pix/important.png) | Important |
|---|---|
The documentation index includes links to the documentation of the target platforms for which the eCosPro release was made. This documentation will describe how to set up your embedded hardware for eCosPro development and, if applicable, how to install RedBoot, GDB Stubs and how to debug your application using JTAG. Please ensure you read through this target platform documentation thoroughly. |
Figure 4.13. Setup Complete Screen
4.11. Installing the Host Tools and GNU source code
While eCos and eCosPro releases are provided in source code format,
the source code of the eCosPro Host Tools and the GNU Toolchains,
can also be installed. To install these you must run each of the
eCosPro Host Tools and the GNU Toolchain installers separately
from the primary eCosPro installer, ideally prior to running
the primary eCosPro installer. The source code will be installed in the
src subdirectory of each component.
For example, on Linux hosts:
-
/opt/ecospro/gnutools-arm-eabi-4.7.3j/srcfor the GNU Toolchain source code -
/opt/ecospro/ecoshosttools-4.0.2/srcfor the eCosPro host tools
On Windows hosts:
-
C:\eCosPro\gnutools-arm-eabi-4.7.3j\srcfor the GNU Toolchain source code -
C:\eCosPro\ecoshosttools-4.0.2\srcfor the eCosPro host tools
The source code to the Eclipse IDE is not provided.
| Notes |
|---|---|
|
| Important |
|---|---|
The standard eCosPro support contracts provided by eCosCentric do not include support for rebuilding the host and GNU tools. |
4.12. Eclipse Installation
The Eclipse instllation requires a Java Runtime Environment
(JRE) with a minimum version on 1.8 to be
installed on your host system in order to run. This must be installed prior
to installing the eCosPro CDT plugin for Eclipse.
The Eclipse installer will
attempt to locate a JRE on the host system during installation. If it fails
to find a suitable candidate, it terminate with an error as illustrated
in Figure 4.12, “Missing Java Error Dialog”.
By default, the standard Eclipse CDT installation for your host is installed
by the installer, and the eCosPro CDT plugin for Eclipse
installed within this installation using the Eclipse p2
installer. If you wish to install the eCosPro CDT plugin for
Eclipse into a third-party or existing release of Eclipse,
you must run the eCosPro Eclipse installer separately and deselect
the Eclipse component. You will still be prompted for the location
where Eclipse is to be installed - this is for the location of the
accompanying documentation. However, when you progress to the next
frame you will also be prompted to provide the path to the
eclipse executable for the Eclipse
installation into which the plugin is to be installed. The
eCosPro CDT plugin for Eclipse installer
will then invoke that installation's p2
installer to install the plugin.
| Warning |
|---|---|
Eclipse does not attempt to check whether a JRE or a suitable JRE is installed following its installation. Eclipse will simply fail to start if no JRE is found or will terminate with an error if the first JRE found in its path is unsuitable. |
4.13. Linux Console Installation
In general, we recommend installing eCosPro from within your graphical
desktop environment (GNOME or KDE), but installation is also possible
from a text-only console or remote shell, as illustrated in Figure 4.14, “eCosPro Linux Console Installation”. The installation steps
are very similar to the graphical installation, with the primary
installer spawning the installers of dependent components if they are
not already installed. To perform a console installation, run the
primary installer with the additional parameters --mode
text. Component installers may also be individually executed
if you are upgrading specific components of the eCosPro
Developer's Kit.
Figure 4.14. eCosPro Linux Console Installation
alexs@avatar /tmp $ ./ecospro-4.1.3-sama5d3x-linux-x64-install.run --mode text
----------------------------------------------------------------------------
Welcome to the eCosPro 4.1.3 for Atmel SAMA5D36-EK board, Atmel SAMA5D31-EK
board and SAMA5D3-XPLD Board  Setup Wizard.

----------------------------------------------------------------------------
Please read the following License Agreement. You must accept the terms of this
agreement before continuing with the installation.

Press [Enter] to continue: | Note |
|---|---|
The |
4.14. Individual Installation and Build Environment
Advanced eCosPro users may wish to install eCosPro or its components
individually. When doing so users must then set their own build environment
to configure and build eCosPro and their applications.
For example, the PATH environment variable
must be set to include the bin directory of the
GNU Toolchain at its installed location (e.g.
/opt/ecospro/gnutools-arm-eabi-4.7.3j/bin or
C:\eCosPro\gnutools-arm-eabi-4.7.3j\bin) as well as the
bin directory of the eCos host tools at their installed
location (e.g. /opt/ecospro/ecoshosttools-4.0.2/bin or
C:\eCosPro\ecoshosttools-4.0.2\bin). They must also set the
ECOS_REPOSITORY environment variable to point to the
packages subdirectory of the eCosPro installation (e.g.
/opt/ecospro/ecos-4.1.3/packages or
C:\eCosPro\ecos-4.1.3\packages).
For further information please see Chapter 6, Environment Variables.
| | | |
| Chapter 3. Installing |  | Chapter 5. After installation |
| 2025-10-02 | eCosPro Non-Commercial Public License |